A drip irrigation system goes together in one order: vacuum breaker, filter (120 to 200 mesh), pressure regulator, then 1/2-inch tubing, emitters and end caps. Size each zone from a bucket test and the dripline maker’s run-length chart.
Key takeaways
- Parts at the faucet go in a fixed order. Colorado State Extension lists backflow device, control valve, filter, then pressure regulator, and DripWorks puts a hose vacuum breaker after any battery timer so it is never under constant pressure.
- A 5-gallon bucket that fills in 60 seconds means 300 gallons per hour (GPH) at the faucet (Utah State Extension). Plan on 75 percent of that, and keep a 1/2-inch mainline under 200 GPH and 200 feet per zone (CSU).
- Run length is product-specific: Rain Bird XFD dripline with 0.9 GPH emitters every 12 inches runs 155 feet at 15 psi, while the 0.6 GPH, 18-inch version runs 596 feet at 60 psi (Rain Bird XF guide).
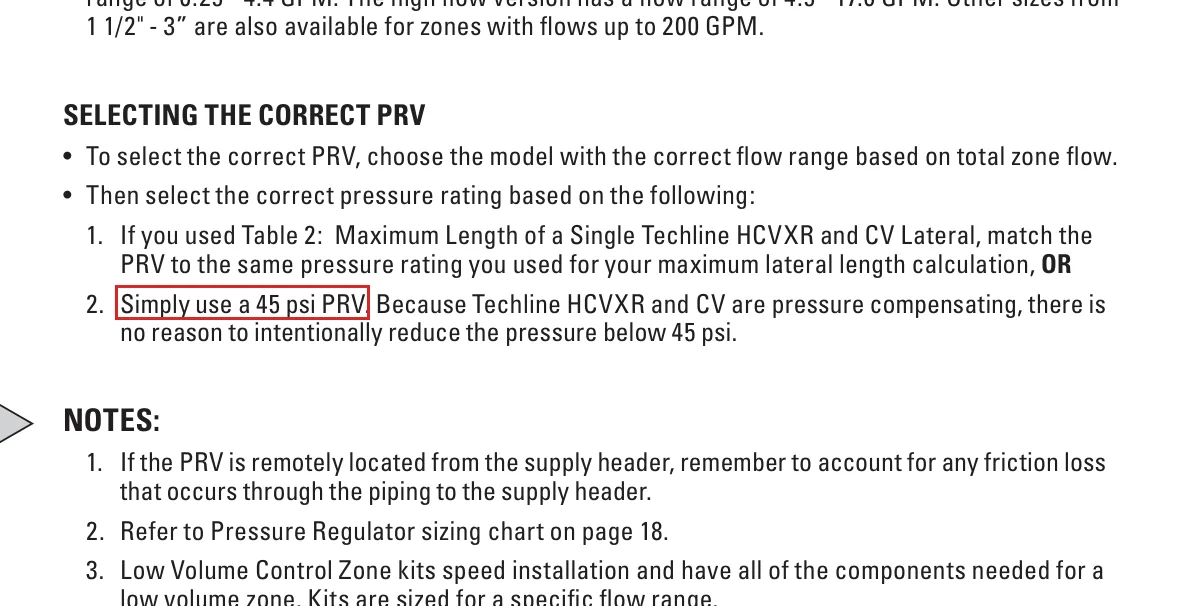
- Set the regulator to the emitter, not to a rule of thumb: DIG drippers run at 15 to 25 psi (DIG guide), and Netafim tells installers to use a 45 psi regulator on Techline dripline (Netafim design guide).
- CSU designs home drip for about 1 hour of run time a week and sizes emitters to that: three 2 GPH emitters for a newly planted 1-inch caliper tree, three 4 GPH emitters for a 2-inch caliper tree (CSU).
- Plumbing codes require backflow protection on hose connections (IPC 2021 §608.16.4.2), and the UPC sets an atmospheric vacuum breaker at least 6 inches above the highest point it serves (UPC §603.5.7).
120 to 200 mesh filtration most drip systems need (Utah State Extension)
200 GPH flow limit for one 1/2-inch mainline zone (Colorado State Extension)
75% share of bucket-test flow to plan on (Colorado State Extension)
1 hour weekly run time CSU designs home drip around (Colorado State Extension)
What parts does a drip irrigation system need?
A drip irrigation system needs 10 kinds of parts: a backflow device, an optional timer, a filter, a pressure regulator, mainline tubing, 1/4-inch feeder tubing, emitters or dripline, fittings and end closures, and stakes. Colorado State Extension names the 3 most common setup mistakes as skipping the filter or regulator, running mainline too long and adding too many emitters.
| Part | What it does | What to buy | Source |
|---|---|---|---|
| Backflow device | Stops garden water siphoning back into house water | Hose-connection vacuum breaker on a faucet; atmospheric vacuum breaker (AVB), pressure vacuum breaker or RP assembly on a permanent tie-in | IPC 2021 §608.16.4.2, §608.17.5 |
| Timer (optional) | Turns the zone on and off | Battery hose-end timer ahead of the vacuum breaker, or a valve wired to a controller | DripWorks FAQ; DIG guide |
| Filter | Keeps grit out of emitter passages | 120 to 200 mesh on city water; a Y or T filter cleans without taking the line apart | USU; CSU |
| Pressure regulator | Cuts house pressure to the emitter’s range | Match the emitter: 25 psi (DIG), 30 psi (DripWorks kits), 40 to 45 psi (Rain Bird and Netafim PC dripline zones) | DIG; Netafim; Rain Bird |
| Mainline, 1/2 or 3/4 in. poly | Carries water to each bed | 1/2 in.: up to 200 ft and 200 GPH per zone; 3/4 in.: up to 480 GPH | CSU |
| 1/4 in. tubing | Branches from the mainline to single plants | Short runs; DIG rates its micro tubing at 15 GPH maximum | DIG guide |
| Emitters | Meter water to each plant | 0.5, 1, 2 or 4 GPH, pressure compensating (PC) on slopes and long runs; one brand only, since color codes differ | CSU |
| Dripline | Tubing with built-in emitters every 6 to 24 in. | Dense beds, groundcover and vegetable rows | USU; CSU |
| Fittings, end caps, goof plugs | Join, close and plug the tubing | Match the tubing’s outside diameter; “1/2 inch” ranges from 0.634 in. (Rain Bird XFD) to 0.700 in. (DIG) | Rain Bird; DIG; Drip Depot |
| Stakes | Hold tubing in place | One every 2 to 3 ft (USU) or every 3 ft (CSU) | USU; CSU |
In what order do the parts at the faucet go?
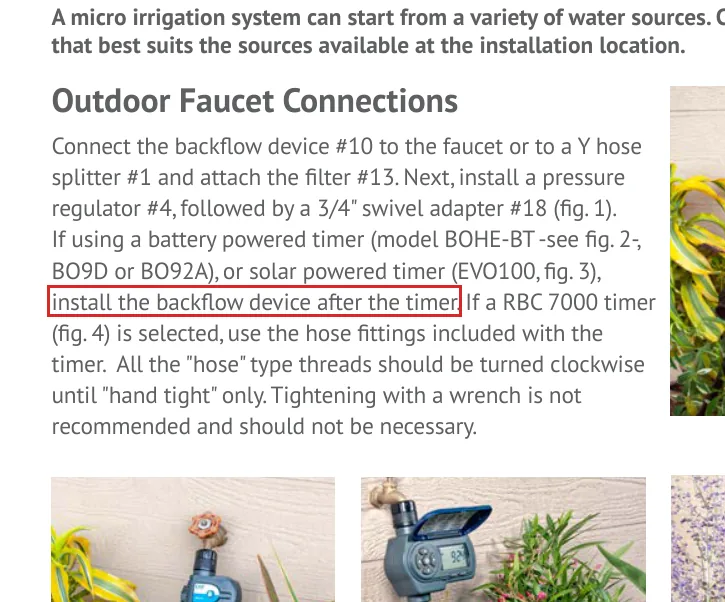
At a faucet the order is: faucet, battery timer, hose vacuum breaker, filter, pressure regulator, then the adapter into the tubing. The timer goes first because DripWorks says its vacuum breakers “should not be kept under constant pressure,” and IPC §608.17.5 bars valves downstream of an atmospheric vacuum breaker. The regulator sits after the filter so grit cannot jam it.
- Faucet, with an optional Y splitter so a garden hose can share it (CSU).
- Battery or solar hose-end timer, hand-tightened; DIG advises against using a wrench on hose threads.
- Hose vacuum breaker. DripWorks mounts its units about 12 inches above the drip system; where an atmospheric vacuum breaker is used instead, UPC §603.5.7 sets it at least 6 inches above the highest point of use.
- Filter, 120 to 200 mesh for city water (USU, CSU); Netafim calls 120 mesh enough for Techline and says finer mesh only means more frequent cleaning.
- Pressure regulator matched to the emitters, placed downstream of the filter (DripWorks).
- Hose-thread-to-tubing adapter, then the 1/2-inch mainline.
A permanent zone off an in-ground sprinkler system uses the same logic with plumbing parts: backflow assembly, control valve, filter, then regulator (CSU). Rain Bird sells that sequence as a control zone kit; its XCZ-075-PRF pairs a 3/4-inch low-flow valve with a 40 psi regulating filter rated 0.2 to 5 gallons per minute (Rain Bird XF guide).
How much water can your faucet supply?
Time a 5-gallon bucket at full flow: gallons divided by seconds, times 3,600, gives gallons per hour. Utah State Extension works the example at 60 seconds, which is 300 GPH. Colorado State treats 75 percent of the measured flow as the most one zone can use, and caps a 1/2-inch mainline at 200 GPH even when the faucet supplies more.
- Open the outdoor faucet fully with nothing attached.
- Time how many seconds a 5-gallon bucket takes to fill; repeat at the hour the timer will run, since pressure drops when neighbors irrigate (USU).
- Divide 5 by the seconds, then multiply by 3,600 to get GPH.
- Multiply by 0.75 for the usable flow (CSU).
- Take the lower of that number and the tubing limit: 200 GPH for 1/2-inch poly, 480 GPH for 3/4-inch (CSU).
| Step | Utah State example | Iowa State example | Source |
|---|---|---|---|
| Seconds to fill 5 gallons | 60 | 30 | USU; ISU |
| Faucet flow (5 ÷ seconds × 3,600) | 300 GPH | 600 GPH | Arithmetic |
| Usable flow at 75% | 225 GPH | 450 GPH | CSU; ISU |
| 1/2-inch mainline limit | 200 GPH | 200 GPH | CSU (DIG: 220 GPH) |
| Zone budget on 1/2-inch line | 200 GPH | 200 GPH | Lower of the two |
| Zone budget on 3/4-inch line | 225 GPH | 450 GPH | CSU: 480 GPH limit |
| 1 GPH emitters per zone (1/2 in.) | 200 | 200 | Budget ÷ 1 GPH |
Adding up a zone is plain multiplication. A foundation bed with 12 shrubs on two 2 GPH emitters each (48 GPH), 30 perennials on two 1 GPH emitters each (60 GPH) and 2 new 2-inch caliper trees on three 4 GPH emitters each (24 GPH) totals 132 GPH, or 2.2 gallons per minute. That fits a 1/2-inch line with 68 GPH to spare. CSU gives the same arithmetic: fifty 2 GPH emitters need 100 GPH.
How long can one drip line run?
Each dripline maker publishes a maximum lateral length that changes with emitter flow, emitter spacing and inlet pressure. Rain Bird XFD dripline runs 155 to 596 feet across its table, so a single “200-foot rule” overstates some lines and understates others. When branches split off a header, Rain Bird adds the branched lengths together; a loop fed from both ends may run twice the table length.
- 0.6 GPH, 12 in.
- 0.9 GPH, 12 in.
- 0.6 GPH, 18 in.
- 0.9 GPH, 18 in.
Source: Rain Bird XF Series Dripline Design, Installation and Maintenance Guide Emitter flow and spacing in each line name. Branched rows count together; a loop fed from both ends may run twice the length.
Show the numbers
| 0.6 GPH, 12 in. | 0.9 GPH, 12 in. | 0.6 GPH, 18 in. | 0.9 GPH, 18 in. | |
|---|---|---|---|---|
| 15 psi | 273 | 155 | 314 | 250 |
| 20 psi | 318 | 169 | 353 | 294 |
| 30 psi | 360 | 230 | 413 | 350 |
| 40 psi | 395 | 255 | 465 | 402 |
| 50 psi | 417 | 285 | 528 | 420 |
| 60 psi | 460 | 290 | 596 | 455 |
| Inlet pressure | 0.6 GPH, 12 in. | 0.9 GPH, 12 in. | 0.6 GPH, 18 in. | 0.9 GPH, 18 in. |
|---|---|---|---|---|
| 15 psi | 273 | 155 | 314 | 250 |
| 20 psi | 318 | 169 | 353 | 294 |
| 30 psi | 360 | 230 | 413 | 350 |
| 40 psi | 395 | 255 | 465 | 402 |
| 50 psi | 417 | 285 | 528 | 420 |
| 60 psi | 460 | 290 | 596 | 455 |
Netafim Techline CV comes out shorter at the same settings: 0.6 GPH emitters at 12 inches reach 190 feet at 20 psi and 343 feet at 45 psi (Netafim Techline HCVXR and CV Design Guide, Table 2). Netafim uses the table backwards, too: a 299-foot lateral of that line sets the zone pressure at 35 psi.
What do the 30-foot and 200-foot rules leave out?
Retail rules of thumb are a starting point, and maker charts disagree with them in both directions. Drip Depot caps 1/4-inch tubing at 30 feet and 30 GPH and 1/2-inch at 200 feet and 200 GPH. DIG, Rain Bird and Netafim publish tighter or looser numbers for their own tubing, so read the chart for the exact product on the roll.
| Common guidance | What the maker or extension sheet says | Source |
|---|---|---|
| 1/4-inch tubing: 30 ft and 30 GPH (Drip Depot) | DIG micro tubing: 15 GPH maximum. DIG Microline 1/4-inch dripline at 25 psi: 16 ft at 6-in. spacing, 22 ft at 9 in., 28 ft at 12 in. | DIG guide; DIG Microline page |
| 1/2-inch line: 200 ft per run (Drip Depot, CSU) | Rain Bird XFD 0.9 GPH at 12 in., 15 psi: 155 ft. Netafim Techline CV 0.9 GPH at 12 in., 20 psi: 144 ft. XFD 0.6 GPH at 18 in., 60 psi: 596 ft | Rain Bird; Netafim |
| 1/2-inch line: 200 GPH (Drip Depot, CSU) | DIG: 220 GPH (3.6 GPM); CSU notes 250 GPH or more is possible because inside diameters differ by maker | DIG; CSU |
| Regulate to 25 psi | Netafim: “simply use a 45 psi PRV” on Techline. Rain Bird XCZ-075-PRF zone kit: 40 psi. Drip tape is rated at 8 psi | Netafim; Rain Bird; Penn State |
| Most homes supply 25 to 35 psi (Iowa State) | Household static pressure is 50 to 70 psi (CSU) or 40 to 100 psi (USU); IPC §604.8 requires a reducing valve in the house above 80 psi, but exempts lines to outdoor faucets | ISU; CSU; USU; IPC 2021 |
| A 100-mesh filter is enough (Iowa State) | Rain Bird XFD: 120 mesh; Rain Bird 1/4-inch LDQ dripline: 200 mesh; DIG Microline: 150 mesh minimum | Rain Bird; DIG |
| Blow lines out with air under 30 psi (Iowa State) | Rain Bird: 40 psi or less with the flush valve open; its XF insert fittings are rated to 50 psi | Rain Bird XF guide, p. 56 |
What pressure and filter does a drip system need?
Run the pressure and mesh printed for the emitter or dripline you bought. Ranges span 8 psi for drip tape to 60 psi for Rain Bird XFD, and filters span 120 to 200 mesh. House pressure is higher: CSU puts typical static pressure at 50 to 70 psi, and Utah State says home systems see 40 to 100 psi, which is why the regulator is not optional.
| Product | Operating pressure | Filtration | Source |
|---|---|---|---|
| Rain Bird XFD dripline, 1/2 in. | 8.5 to 60 psi | 120 mesh | Rain Bird XF guide |
| Rain Bird LDQ 1/4-in. landscape dripline | 10 to 40 psi; 0.8 GPH at 30 psi | 200 mesh | Rain Bird XF guide |
| Rain Bird 1800-RETRO spray-to-drip kit | 30 psi regulator built in; 0.5 to 6 GPM | 200 mesh screen | Rain Bird XF guide |
| Netafim Techline CV dripline | Compensates 14.5 to 58 psi; maker suggests a 45 psi regulator | 120 mesh | Netafim design guide |
| DIG button and flag drippers | 15 to 25 psi | 155-mesh filter in DIG head kits | DIG guide |
| DIG Microline 1/4-in. dripline | 0.65 GPH at 25 psi; 0.42 GPH at 10 psi | 150 mesh minimum | DIG |
| Drip tape (vegetable rows) | Flow rated at 8 psi | Per tape maker | Penn State Extension |
| DripWorks garden bed kits | 30 psi (small, medium); 20 psi (large) | FYCH200 filter included | DripWorks small; large |
Elevation changes the number. CSU adds 5 psi to the operating pressure for every 10 feet the bed rises above the faucet. On slopes, check-valve emitters stop low spots from draining after shutoff: Netafim Techline CV holds back 4.6 feet of elevation and Techline HCVXR holds 8.5 feet (Netafim).
How many emitters does each plant need?
Start from the plant’s weekly water, then pick emitters that deliver it in the zone’s run time. Colorado State designs home systems for about 1 hour a week once plants are established, so a perennial needing 2 gallons gets 2 GPH of emitters. CSU’s starting counts for new plantings run longer than an hour, which is the gap the last column closes.
If the tree is going in now, our tree planting cost guide covers container sizes and planting prices. CSU starts a 1-inch caliper tree on three 2 GPH emitters and a 2-inch caliper tree on three 4 GPH emitters, then moves to higher-flow emitters as the canopy spreads.
| Plant | Gallons per week (CSU) | CSU starting emitters | Minutes per week with those | Emitters for a 60-minute week |
|---|---|---|---|---|
| Xeric perennial | 1 | Two 0.5 GPH | 60 | Two 0.5 GPH |
| Perennial or annual, moderate water | 2 | Two 0.5 GPH | 120 | Two 1 GPH |
| Shrub from a 5-gallon container | 4 to 6 | Two 1 GPH, 12 in. from the base | 120 to 180 | Two or three 2 GPH |
| Large shrub | 10 to 12 | Three 1 GPH | 200 to 240 | Three 4 GPH |
| Tree whip at planting | 1 to 2 | Two 0.5 GPH | 60 to 120 | Two 1 GPH |
| 1-inch caliper tree at planting | 6 to 8 | Three 2 GPH | 60 to 80 | Three 2 GPH |
| 2-inch caliper tree at planting | 10 to 12 | Three 4 GPH | 50 to 60 | Three 4 GPH |
Soil moves the spacing. CSU sets emitters 12 inches apart in sand, 18 in loam and 24 in clay, and says a plant that needs 1 or 2 emitters in clay may need 2 or 3 in sand. Utah State gives an average perennial one 1 GPH emitter in loam or clay and two in sand, run for half the time. A lab texture result from a soil test settles which column applies.
Trees get emitters at the canopy edge, not the trunk. Utah State sizes them with a formula: canopy diameter squared × 0.7854 × the share to wet (50 to 60 percent) ÷ the area one emitter wets. Its worked example is a 15-foot canopy in loam with emitters wetting 21 square feet each.
| Input | Value | Arithmetic |
|---|---|---|
| Canopy diameter | 15 ft | Measured |
| Canopy area | 176.7 sq ft | 15 × 15 × 0.7854 |
| Area to wet at 60% | 106.0 sq ft | 176.7 × 0.60 |
| Area one emitter wets (loam) | 21 sq ft | USU, 5.2 ft wetted diameter |
| Emitters needed | 6 | 106.0 ÷ 21 = 5.05, rounded up |
How far apart should dripline rows be?
In a dense bed, dripline rows replace single emitters, and soil sets both flow and spacing. Netafim’s Techline CV table runs from 0.26 GPH emitters every 18 inches in clay, with rows 18 to 22 inches apart, to 0.9 GPH every 12 inches in coarse sand. Applying a quarter inch at those settings takes 80 to 97 minutes in clay and 10 to 13 in coarse sand.
| Soil | Emitter flow (GPH) | Emitter spacing | Row spacing | Inches per hour | Minutes to apply 1/4 in. |
|---|---|---|---|---|---|
| Clay | 0.26 | 18 in. | 18 / 20 / 22 in. | 0.19 / 0.17 / 0.15 | 80 / 89 / 97 |
| Loam | 0.4 | 12 in. | 12 / 14 / 18 in. | 0.64 / 0.55 / 0.43 | 23 / 27 / 35 |
| Sandy | 0.6 | 12 in. | 12 / 14 / 18 in. | 0.98 / 0.84 / 0.65 | 15 / 18 / 23 |
| Coarse sand | 0.9 | 12 in. | 12 / 14 / 16 in. | 1.48 / 1.27 / 1.11 | 10 / 12 / 13 |
Hunter’s design guide lands close: 0.4 GPH at 24 inches with 18 to 24-inch rows in clay, 0.6 GPH at 18 inches with 16 to 22-inch rows in loam, and 1.0 GPH at 12 inches with 12 to 18-inch rows in sand (Hunter Industries). Any inline grid’s rate follows Utah State‘s formula: GPH × 231.1 ÷ (emitter spacing × row spacing, in inches).
How do you set up a drip irrigation system, step by step?
Setting up a drip irrigation system takes 10 steps and no trenching: plan zones, measure flow, size the tubing, build the head assembly, lay and flush the mainline, add emitters or dripline, then pressure-test, mulch and program the timer. CSU notes the mainline can sit on the surface, unlike sprinkler pipe, though wire stakes may need resetting if the tubing is not covered.
- Sketch the yard and group plants into zones. Put plants with similar water needs on one zone (Iowa State), keep micro-sprays (7 to 25 GPH each) off drip zones, and never mix drip with spray heads on one valve (CSU). Measure the feet of mainline each zone needs.
- Run the bucket test. Record GPH at the faucet, take 75 percent, and use the lower of that and the tubing limit as the zone budget.
- Choose tubing size. Use 1/2-inch poly up to 200 feet and 200 GPH, 3/4-inch up to 480 GPH (CSU), and check any dripline against its maker’s run-length chart.
- Build the head assembly. Faucet, timer, vacuum breaker, filter, regulator, adapter. Hand-tighten hose threads, since DIG advises against using a wrench on them; on pipe threads DIG calls for 3 to 5 wraps of Teflon tape.
- Lay the mainline. Snake it through the bed rather than pulling it straight, use elbows at tight corners instead of kinking it, stake it every 2 to 3 feet, and keep headers 2 to 4 inches off paving (Rain Bird).
| Layout detail | Number | Source |
|---|---|---|
| Stake spacing | Every 2 to 3 ft (USU); every 3 ft (CSU) | USU; CSU |
| Header setback from paving or bed edge | 2 to 4 in. | Rain Bird |
| Emitters on a new shrub | Two, 12 in. from the base | CSU |
| Emitters on a large shrub | Every 3 to 4 ft around it, about 2 ft from the base | Iowa State |
| Dripline expansion | 0.1 in. per 100 ft for every 1°F of temperature change | Rain Bird |
| Low point | One emitter or a drain valve, for winter draining | CSU |
- Flush, then close the end. Run water through the open line before any emitters go in (Iowa State), then fold the end into a figure-8 or fit an end cap or flush valve.
- Punch in emitters and 1/4-inch feeders. Put emitters over the root ball of new plants and 12 inches from the base of shrubs (CSU). Keep each 1/4-inch run short and within its maker’s limit.
- Add dripline rows in dense beds. Space rows by soil and check the longest row, or the total of branched rows, against the maker’s table.
- Pressurize and check every emitter. Put one emitter or a drain valve at the lowest point so the line can empty for winter (CSU). A pop-up flag indicator shows when the zone is running, since drip water is hard to see.
- Mulch and set the timer. Lay tubing on weed fabric and under mulch to hide it and cut sun exposure (CSU); our mulch calculator sizes the order. Program the run time from the next section.
How many drip lines does a 4 x 8 raised bed need?
A 4-foot-wide raised bed in loam or sandy mix takes 4 dripline rows about 14.7 inches apart; in heavy clay, 3 rows 22 inches apart. The method is Netafim’s: subtract a 2-inch edge setback from each side, divide by the maximum row spacing for the soil, round up, and add 1. DripWorks’ small kit, 100 feet of dripline for 3 beds, works out to the same 33 feet a bed.
| Step | Loam or sandy mix | Clay | Source |
|---|---|---|---|
| Bed width | 48 in. | 48 in. | Measured |
| Minus 2 in. setback each side | 44 in. | 44 in. | Rain Bird (2 to 4 in.) |
| Maximum row spacing | 18 in. | 22 in. | Netafim Table 1 |
| Spaces (44 ÷ max, rounded up) | 3 | 2 | Arithmetic |
| Rows (spaces + 1) | 4 | 3 | Netafim |
| Actual row spacing | 14.7 in. | 22 in. | 44 ÷ spaces |
| Dripline for an 8-ft bed | 32 ft | 24 ft | Rows × 8 ft |
| Flow at 0.6 GPH every 12 in. | 19.2 GPH | 14.4 GPH | Emitters × 0.6 |
How long should you run a drip system?
Run time is the plant’s weekly gallons divided by the zone’s GPH, times 60. Vegetables need 1 to 1.5 inches of water a week (Penn State Extension), and 1 inch over 1 square foot is 0.623 gallons (Utah State). For the 4-row raised bed in loam, that is 62 to 93 minutes a week.
| Planting | Water per week | Zone flow | Minutes per week | Arithmetic |
|---|---|---|---|---|
| 4 x 8 ft vegetable bed, 4 rows of 0.6 GPH dripline | 19.9 to 29.9 gal (1 to 1.5 in.) | 19.2 GPH | 62 to 93 | 32 sq ft × 0.623 × inches ÷ 19.2 × 60 |
| Perennial on two 1 GPH emitters | 2 gal (CSU) | 2 GPH | 60 | 2 ÷ 2 × 60 |
| Shrub from a 5-gallon container on two 2 GPH emitters | 4 to 6 gal (CSU) | 4 GPH | 60 to 90 | 4 to 6 ÷ 4 × 60 |
| 2-inch caliper tree on three 4 GPH emitters | 10 to 12 gal (CSU) | 12 GPH | 50 to 60 | 10 to 12 ÷ 12 × 60 |
Split the weekly total by soil. CSU says new plantings on sandy soil may need two waterings a week, while xeric plants such as Penstemon and Apache plume do better watered weekly or every other week. Utah State uses short, frequent “pulse” runs in sand and clay, and Penn State limits each event so water stays in a 10-inch root zone: 110 minutes for its sandy-loam drip-tape example.
Check the soil the day after a run at the depth the roots grow, and adjust (CSU). Iowa State has the first run soak the bed 10 to 12 inches deep and suggests early-morning runs so the system does not compete with household water use. CSU warns against leaving drip on overnight on the theory that it applies water slowly. For lawn watering hours and inches, see our guide to the best time to water grass.
| Planting | Run length | Hot weather | Warm | Cool |
|---|---|---|---|---|
| Flowers, vegetables | 30 min to 1 hr | Every 1 to 2 days | Every 3 days | Every 3 to 4 days |
| Small trees, shrubs | 1 to 2 hr | Every 1 to 2 days | Every 2 to 3 days | Every 3 to 4 days |
| Medium trees, shrubs | 5 to 7 hr | Every 2 to 3 days | Every 2 to 3 days | Every 4 to 5 days |
| Large trees, shrubs | 6 to 8 hr | Every 1 to 2 days | Every 2 to 3 days | Every 5 to 6 days |
| Pots up to 15 in. | 3 to 5 min | Every 1 to 2 days | Every 2 to 3 days | Every 4 to 5 days |
Should you buy a drip kit or separate parts?
A kit buys a matched parts list at a modest premium. DripWorks’ garden bed kits list at $98.75 for 3 beds and $166.85 for 9, about $33 and $19 a bed, and none of the 4 kit contents lists we read includes a backflow device; add one for $7.69 to $9.99. Installed prices for a drip zone are in our sprinkler system cost guide.
| Kit | Listed price | Covers | Tubing and emitters | Regulator and filter | Backflow device |
|---|---|---|---|---|---|
| DripWorks Garden Bed Irrigation Kit, Small (KGB1) | $98.75 | Three 4 x 8 ft beds | 50 ft 1/2 in.; 50 ft 1/4 in.; 100 ft 1/4-in. dripline, 12-in. spacing | 30 psi; FYCH200 filter | Not listed |
| DripWorks Garden Bed Irrigation Kit, Medium | $166.85 | Nine 4 x 8 ft beds | 100 ft 1/2 in.; 100 ft 1/4 in.; 300 ft dripline | 30 psi; FYCH200 filter | Not listed |
| DripWorks Garden Bed Irrigation Kit, Large | $329.55 | 18 beds, 4 x 8 ft | 250 ft 3/4 in.; 200 ft 1/4 in.; 600 ft dripline | 20 psi; FYCH200 filter | Not listed |
| DripWorks Individual Plant Irrigation Kit, Small (KIP1) | $96.75 | 60 plants | 50 ft 1/2 in.; 100 ft 1/4 in.; 40 x 1 GPH, 10 x 2 GPH, 10 x 4 GPH emitters (100 GPH) | 30 psi; FYCH200 filter | Not listed |
| Part | Spec | Seller | Listed price |
|---|---|---|---|
| 1/2-in. poly tubing, 100 ft | 0.600 in. ID x 0.700 in. OD | Drip Depot | $17.98 |
| 1/4-in. poly tubing, 100 ft | 0.170 in. ID x 0.250 in. OD | Drip Depot | $6.59 |
| 1/4-in. dripline, 100 ft | 0.5 GPH every 6 in. | Drip Depot | $17.74 |
| PC dripper | 1 GPH | Drip Depot | $0.23 each |
| Pressure regulator | 25 psi, 3/4-in. hose thread | Drip Depot | $5.44 |
| Senninger pressure regulator | 10, 20, 30 or 40 psi, hose thread | DripWorks | $11.35 |
| Irritec Y filter | 155 or 200 mesh, hose thread | DripWorks | $16.35 |
| Hose bibb vacuum breaker | Antelco | Drip Depot | $7.69 |
| Hose vacuum breaker | Agrifim, FHT x MHT | DripWorks | $9.99 |
| Battery hose-end timer | 1 outlet | Drip Depot | $29.56 |
| Mainline head assembly | 3/4 in., 25 psi, 1 zone | Drip Depot | $25.29 |
Buying the parts for a 3-bed system separately costs $71.79 before fittings: 100 feet of 1/2-inch tubing, 100 feet each of 1/4-inch tubing and dripline, a 25 psi regulator, a 200-mesh filter and a vacuum breaker. The DripWorks small kit plus a $9.99 vacuum breaker is $108.74. The $36.95 gap pays for the punch, transfer barbs, couplers, goof plugs and hold-downs, which we did not price, so the savings from separate parts may be small.
- Emitters
- 60
- Zone flow with 1 GPH emitters (GPH)
- 60
- Share of a 1/2-in. line's 200 GPH (%)
- 30
Emitter and tubing prices are Drip Depot list prices, Oct. 28, 2026. The head assembly range is $7.69 vacuum breaker + $16.35 filter + $5.44 regulator (low) to $9.99 + $16.35 + $11.35 (high). Flow lines assume 1 GPH emitters; compare them with 200 GPH for one 1/2-in. mainline (CSU).
Do you need a backflow preventer or a permit for drip irrigation?
Yes on backflow, usually no on permits for a hose-end system. The 2021 International Plumbing Code requires every hose connection to be protected by a vacuum breaker (§608.16.4.2), and a permanent tie-in needs an AVB, a pressure vacuum breaker or an RP assembly (§608.17.5). CSU says to ask the building department or water provider which device your area requires.
| Situation | Rule | Code section |
|---|---|---|
| Any faucet or hose connection | Protected by an atmospheric or pressure-type vacuum breaker, or a permanently attached hose connection vacuum breaker | IPC 2021 §608.16.4.2 |
| Faucet in a UPC jurisdiction | Nonremovable hose bibb backflow preventer or vacuum breaker, or an AVB at least 6 in. above the highest point of use, past the last valve; self-draining frost-proof bibb where it freezes | UPC §603.5.7 (Hawaii Plumbing Code 2021 text) |
| Drip zone tied into the house supply or a sprinkler system | AVB, pressure vacuum breaker assembly or RP assembly; no valves downstream of an AVB | IPC 2021 §608.17.5 |
| Fertilizer injector on the line | Reduced pressure principle (RP) assembly | IPC 2021 §608.17.5; Hunter guide |
| House pressure over 80 psi static | Pressure-reducing valve on the building supply; lines to outdoor faucets are exempt, so a faucet can exceed 80 psi | IPC 2021 §604.8 |
Who may install a permanent irrigation system is a separate question that some states answer with a license; our sprinkler installation guide covers those rules and backflow testing fees. A hose-end drip kit on your own faucet sits outside that work, but a new valve cut into the house supply falls under the code sections in the table. Ask the permit office whether the backflow device needs an annual test.
This page is general information, not plumbing or legal advice. Backflow and permit rules vary by city and water provider; confirm the device your provider requires before you connect to the house supply.
How do you maintain and winterize a drip system?
Clean the filter monthly in the growing season, flush the lines after every repair, and drain the system before a hard freeze. Utah State moves filter checks to weekly when the water carries sediment. Rain Bird flushes new dripline every 2 weeks for the first 6 weeks, and CSU flushes the mainline and checks every emitter each spring.
| When | Task | Source |
|---|---|---|
| Install day | Flush mainline and headers before emitters and end caps go in | Iowa State |
| Week 1 | Open the filter; how dirty it is sets the cleaning interval | DIG |
| Weeks 1 to 6 | Flush the dripline every 2 weeks and check the flush water | Rain Bird |
| Growing season | Clean the filter monthly, weekly with well, pond or secondary water | USU; CSU |
| Spring start-up | Flush mainline, clean filter, pressurize and check each emitter | CSU |
| Before freezing | Store the head assembly indoors, open ends and drain | CSU; ISU |
| Years 3 to 4 | Add emitters toward the canopy edge as trees and shrubs grow | USU |
- Shut the faucet and remove the timer, vacuum breaker, filter and regulator; store them indoors (CSU, Iowa State).
- Uncap line ends and lift tubing so low spots drain; Iowa State says this can take several hours.
- If you blow the lines out, keep air at 40 psi or less with the flush valve open; Rain Bird rates its XF insert fittings to 50 psi.
- Refit end caps loosely so debris stays out over winter (Iowa State). CSU notes poly mainline is not damaged by freezing, but fittings and check valves can hold water.
Clogs come from grit and minerals. Utah State shows calcium crust forming on emitters in hard water, and its fix is replacing the affected emitters or tubing. Breaks are cheap to mend; our sprinkler repair cost guide lists drip and poly-hose repairs at $35 to $60 on contractor price lists.
Drip or spray: which fits each part of the yard?
Drip fits anything planted in beds, rows or pots; open lawn stays on spray or rotor heads unless subsurface dripline goes 4 to 6 inches deep. Trees that will pass 25 feet may be impractical to irrigate fully with drip (CSU). The table pairs each situation with the layout and the threshold behind it. More watering and planting guides sit on our turf and trees hub.
| If your situation is | Do this | Why (source) |
|---|---|---|
| Open lawn | Keep spray or rotor heads; use subsurface dripline only buried 4 to 6 in., 6 in. if you core-aerate with tines set to 4 in. or less | Netafim Table 1; Rain Bird |
| Shrubs, perennials or pots spaced apart | PC point-source emitters on a 1/2-in. line, with short 1/4-in. feeders | USU; CSU |
| Dense bed, groundcover or vegetable rows | Inline dripline grid, rows spaced by soil (about 14.7 in. in a 4-ft loam bed) | Netafim |
| Tree expected to exceed 25 ft | Its own zone; rings of emitters at the canopy edge, expanded every 3 to 4 ft | CSU; USU |
| Beds above the faucet or on a slope | PC emitters with check valves; add 5 psi per 10 ft of rise | CSU; Netafim |
| Usable bucket-test flow above 200 GPH | Use 3/4-in. mainline (to 480 GPH) or split into two 1/2-in. lines | CSU; DIG |
| Converting an existing spray zone | Cap every other spray head on that valve; fit a retrofit body with a 30 psi regulator and 200-mesh screen | CSU; Rain Bird 1800-RETRO |
| Well, pond or secondary water | Larger filter, checked weekly | USU; CSU |
| Adding a fertilizer injector | Install an RP backflow assembly first | IPC 2021 §608.17.5 |
1Is it open lawn?
YesKeep spray or rotor heads, or bury dripline 4 to 6 inches deep (Netafim).
NoGo to the next question
2Is it a tree that will grow past 25 feet?
YesGive it its own zone with rings of emitters at the canopy edge (CSU; USU).
NoGo to the next question
3Is it a dense bed, groundcover or vegetable rows?
YesLay inline dripline rows spaced by soil: 18 to 22 inches in clay, 12 to 18 in loam (Netafim).
NoGo to the next question
4Does the bed sit above the faucet or on a slope?
YesUse PC emitters with check valves and add 5 psi per 10 feet of rise (CSU; Netafim).
NoGo to the next question
5Is the usable bucket-test flow above 200 GPH?
YesRun 3/4-inch mainline (to 480 GPH) or two 1/2-inch lines (CSU).
NoUse PC point-source emitters on 1/2-inch mainline with short 1/4-inch feeders, sized to about 1 hour of run time a week (CSU).
Source: Colorado State Extension; Utah State Extension; Netafim Techline design guide
How we compiled this
We compiled this guide from 14 technical documents and 15 product pages, read Oct. 28 and 29, 2026: 5 university extension publications (Colorado State, Utah State, Iowa State, Penn State and UF/IFAS), 5 maker design guides and spec pages (Rain Bird, Netafim, DIG and Hunter), the 2021 International Plumbing Code and Uniform Plumbing Code text, 2 retailer help pages, and DripWorks and Drip Depot product listings. Run times, zone budgets and row counts are arithmetic from those published figures; nothing was field-tested, and prices are listed prices before tax, shipping and sales.
| Setting | Number to use | Source |
|---|---|---|
| Faucet order | Timer, vacuum breaker, filter, regulator | CSU; DripWorks |
| Filter | 120 to 200 mesh on city water | USU; CSU |
| Zone flow, 1/2-in. mainline | Up to 200 GPH and 200 ft; 75% of bucket-test flow | CSU |
| Zone flow, 3/4-in. mainline | Up to 480 GPH | CSU |
| Emitter spacing | 12 in. sand, 18 in. loam, 24 in. clay | CSU |
| Elevation | Add 5 psi per 10 ft of rise | CSU |
| Run-time design | About 1 hour a week, established plants | CSU |
| Vegetables | 1 to 1.5 in. a week; 0.623 gal per sq ft per inch | Penn State; USU |
| Backflow height (UPC) | AVB at least 6 in. above highest point of use | UPC §603.5.7 |
Frequently asked questions
What is a major downside to drip irrigation?
You cannot see it work. Colorado State notes that water seeping at ground level makes failures hard to spot, and that too few or badly placed emitters restrict root growth. Emitters clog without a filter, tubing gets cut by tools, and Iowa State lists a higher installation cost as a drawback.
Which is better, soaker hose or drip irrigation?
Drip, for even watering. CSU says soaker hoses and laser tubing have holes but no emitters, so output varies along the length, while emitter tubing irrigates evenly over its full run. Iowa State rates soaker hose as an inexpensive, easy start but notes it wets the spaces between plants and feeds weeds.
How deep should drip line be buried?
In beds, it usually is not buried: lay it on the soil or weed fabric under mulch (CSU). Netafim allows shrub-bed dripline down to 6 inches and buries turf lines 4 to 6 inches. Rain Bird sets turf dripline at 6 inches when aeration tines run 4 inches deep. UF/IFAS warns buried emitters clog more easily.
What are the three types of drip irrigation?
Point-source emitters punched into the line at each plant, inline dripline with emitters built in every 6 to 24 inches, and low-volume sprays or bubblers. Utah State splits drip into the first two; UF/IFAS adds bubblers and microsprayers. CSU keeps microsprays, at 7 to 25 GPH each, on a separate zone.
Can you install drip irrigation yourself?
Yes. Colorado State calls drip easy for do-it-yourselfers because the mainline does not need trenching. Utah State adds that some sprinkler supply stores design a drip system free when you buy the parts there. A permanent tie-in to the house supply needs a backflow assembly under IPC §608.17.5 and, in many places, a permit.
Is it better to run drip irrigation in the morning or evening?
Early morning is the usual setting. Iowa State suggests it so the system does not compete with showers and other household use, and drip keeps foliage dry at any hour. Total gallons matter more than the clock: CSU warns against running drip overnight on the theory that slow water cannot overwater.
Sources
- Colorado State University Extension (C. Wilson, M. Bauer; reviewed by B. Kailey), Drip Irrigation for Home Gardens, fact sheet 4.702, reviewed August 2025. Accessed October 2026.
- Utah State University Extension (J. Gunnell, T. Beddes, B. Barker), The Do-It-Yourself Guide to Backyard Drip Irrigation, June 2025. Accessed October 2026.
- Iowa State University Extension and Outreach, Using Drip Irrigation in the Garden, n.d. Accessed October 2026.
- Penn State Extension, Determining How Long to Run Drip Irrigation Systems for Vegetables, n.d. Accessed October 2026.
- UF/IFAS Gardening Solutions, Microirrigation, n.d. Accessed October 2026.
- Rain Bird Corporation, XF Series Dripline Design, Installation and Maintenance Guide, 2020. Accessed October 2026.
- Netafim USA, Techline HCVXR and CV Design Guide (Tables 1 and 2), n.d. Accessed October 2026.
- DIG Corporation, The Drip Irrigation Guide, n.d. Accessed October 2026.
- DIG Corporation, 1/4 in. Microline Dripline specifications, n.d. Accessed October 2026.
- Hunter Industries (LIT-496, hosted by Citrus Heights Water District), Drip Irrigation Design and Installation Guide, 2012. Accessed October 2026.
- International Code Council, via UpCodes, 2021 International Plumbing Code, Chapter 6 (§604.8, §608.16.4.2, §608.17.5), 2021 edition. Accessed October 2026.
- IAPMO Uniform Plumbing Code, via UpCodes (Hawaii Plumbing Code 2021), §603.5.7 Outlets With Hose Attachments, 2021 edition. Accessed October 2026.
- Drip Depot, Poly Tubing Buying Guide, modified March 24, 2026. Accessed October 2026.
- DripWorks, Installation FAQ (vacuum breakers, regulators), n.d. Accessed October 2026.
- DripWorks, Garden Bed Irrigation Kits (small, medium, large) and Individual Plant Irrigation Kit product pages, prices recorded Oct. 28, 2026. Accessed October 2026.
- Drip Depot, Tubing, dripper, regulator, vacuum breaker, timer and head assembly product pages, prices recorded Oct. 28, 2026. Accessed October 2026.